DIY Balloon Arch: Your Ultimate Guide To Creating Stunning Party Decor
Planning a party or special event? You're likely looking for that one show-stopping decoration that will truly elevate the atmosphere and impress your guests. Look no further than the humble balloon arch! While they might appear intricate and complex, we're here to tell you a secret: It's easier than you think!
Learn how to create a stunning balloon arch for your next party with this easy DIY tutorial. Forget expensive rentals or hiring professionals; with our comprehensive guide, you'll be a balloon arch pro in no time. Find out how to make a balloon arch with our easy guide, designed for absolute beginners. We promise that they look impressive and complex, but they are actually quite simple to make, and the sense of accomplishment you'll feel is just as rewarding as the beautiful decor itself.
In this article, we'll walk you through everything you need to know. We'll get all the tips and tricks to make your first DIY balloon arch, covering various methods, essential materials, and a clear, step-by-step tutorial. We'll also address frequently asked questions to ensure you feel confident and prepared. Get ready to transform your party space and make a memorable statement!
What is a Balloon Arch and Why Make One Yourself?
Before we dive into the how-to, let's clarify what we're talking about. A balloon arch is a gathering and stacking of balloons, held together by either a balloon stand or a string in order to make the appearance of an arch made out of balloons. It's a versatile decoration that can range from a simple, elegant curve to a grand, cascading masterpiece. Essentially, it's a structural arrangement of balloons designed to frame an entrance, a dessert table, a photo booth, or any focal point at your event.
So, why go the DIY route? For starters, a balloon arch makes a pretty party statement so make a DIY balloon garland today! It instantly adds a festive, celebratory vibe that store-bought decorations simply can't match. Beyond aesthetics, there are practical benefits:
- Cost-Effective: Making your own arch is significantly cheaper than hiring a professional or buying a pre-made one.
- Customization: You have complete control over colors, sizes, and design to perfectly match your party theme.
- Personal Touch: There's a unique satisfaction in knowing you created such an impressive piece yourself.
- Versatility:Balloon arches are a great addition to just about any party or event.A DIY balloon arch is a great decoration for birthday parties, graduations, baby showers, bridal showers, anniversaries, corporate events, and more!
Once you learn how to make one, you’ll find it elevates the fun at any event, becoming a fantastic backdrop for photos and a true conversation starter.
Choosing Your Balloon Arch Method
One of the first things to consider is the method you'll use to construct your arch. To make a balloon arch, there are a few different methods, depending on the design you’re hoping to achieve. Each has its pros and cons, and your choice will depend on the size of your arch, its intended location, and your comfort level.
Here are the most common ways you can choose to make a balloon arch by securing balloons:
- Balloon Decorating Strip (Balloon Tape): This is arguably the easiest and most popular method for beginners. It's a clear plastic strip with small holes that allow you to easily insert and secure balloon knots. It's great for organic, free-flowing arches and garlands that don't require a rigid structure.
- Fishing Line or String: For a more traditional, symmetrical arch, or for very long garlands, strong fishing line or a sturdy string works well. You tie balloons directly onto the line, often in clusters of two or four, and then thread them along. This method requires a bit more knot-tying but offers excellent flexibility.
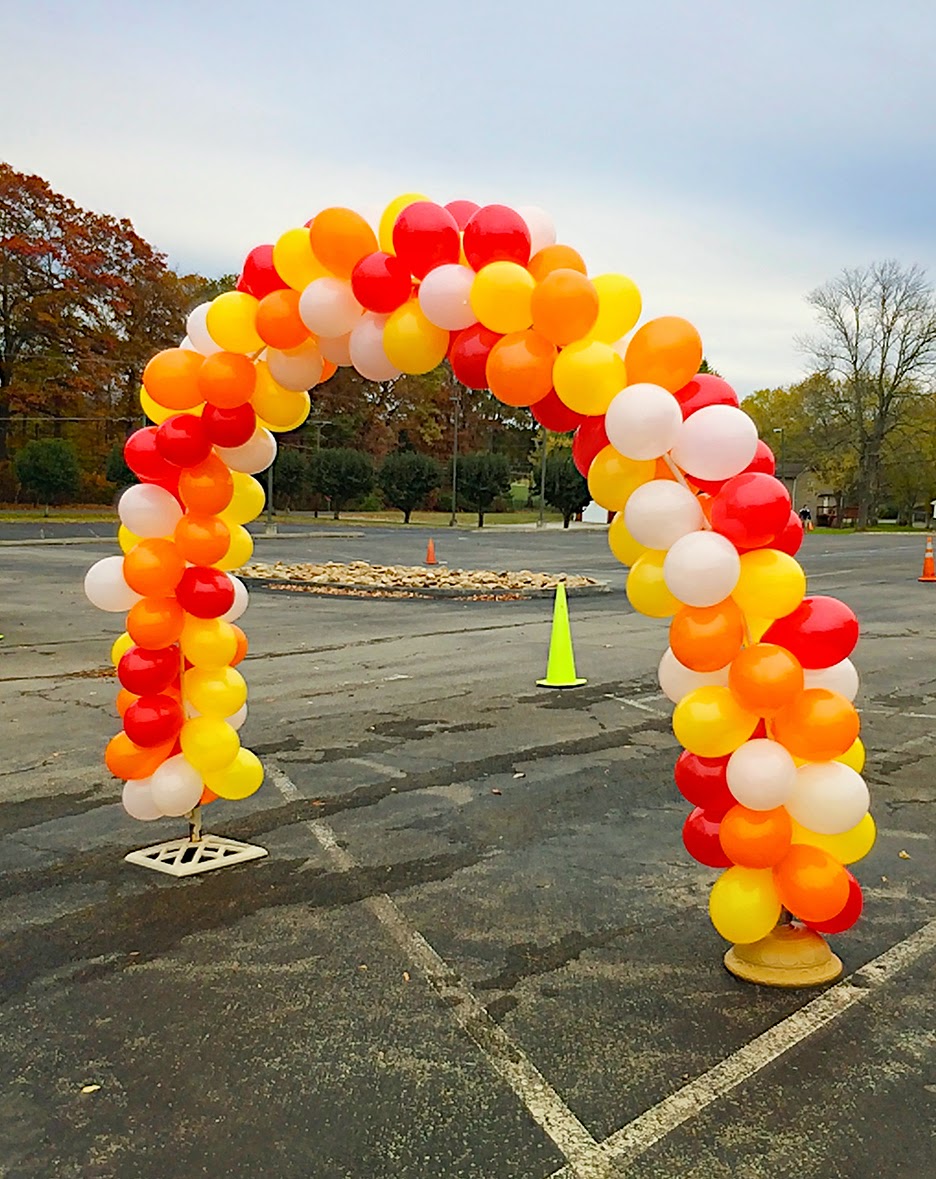
- PVC Pipe or Metal Frame: For a more structured, freestanding arch, especially for outdoor events or large entrances, a frame made of PVC pipe or a pre-made metal arch kit is ideal. You can choose to make a balloon arch by securing balloons onto a frame using balloon clips, fishing line, or zip ties. This provides stability and a perfect arch shape.
For your first attempt, we recommend starting with the balloon decorating strip or fishing line. You can make a basic arch with these methods, which will give you a solid foundation before tackling more complex structures.
Materials You'll Need
Gathering your supplies beforehand will make the process much smoother. Here’s a list of essentials:
- Balloons: A variety of sizes (5-inch, 10-inch, 12-inch, 18-inch, and even larger "jumbo" balloons) will give your arch a professional, organic look. Choose colors that match your theme.
- Balloon Pump: An electric pump is a lifesaver for inflating many balloons quickly. A hand pump is also an option for smaller projects.
- Balloon Decorating Strip, Fishing Line, or Arch Frame: Based on your chosen method.
- Scissors: For cutting string or tape.
- Command Hooks or Wall Hooks: For attaching your arch to a wall or surface.
- Low-Temp Hot Glue Gun (Optional): For attaching smaller balloons or embellishments.
- Ribbon, Greenery, Flowers, or Other Embellishments (Optional): To add extra flair.
Step-by-Step Tutorial: How to Make a Basic Balloon Arch (Using Balloon Tape)
This tutorial focuses on using a balloon decorating strip, as it's the most beginner-friendly way to achieve that trendy, organic look. From selecting balloons to assembling the arch, each step is straightforward and enjoyable.
Step 1: Plan Your Design and Colors
Before inflating, lay out your balloon colors and sizes to visualize your design. Decide on the overall length and shape of your arch. This helps ensure you have enough balloons and a balanced color distribution.
Step 2: Inflate Your Balloons
Using your balloon pump, inflate balloons of various sizes. Do not overinflate them; they should be slightly soft to the touch. This makes them less likely to pop and easier to work with. Inflate a good mix of sizes (e.g., 5-inch, 10-inch, 12-inch). You'll need more small and medium balloons than large ones.
Step 3: Create Balloon Duos or Quads
To create volume and stability, you'll work with balloon clusters. Tie two inflated balloons together at their necks to form a "duo." Then, twist two duos together to form a "quad." This creates a stable unit that's easy to attach. For smaller balloons, you can often just tie them individually or in duos.
Step 4: Attach Balloons to the Decorating Strip
Unroll your balloon decorating strip to the desired length. Now, start attaching your balloon clusters. Take a balloon duo (or quad) and pull one of its knots through a large hole on the strip, then slide it into the smaller, adjacent hole to secure it. Alternate sizes and colors as you go to create a varied and dynamic look. Push the balloons close together to minimize gaps. Remember, you can choose to make a balloon arch by securing balloons tightly to the strip to prevent them from shifting.
Step 5: Add Filler Balloons and Embellishments
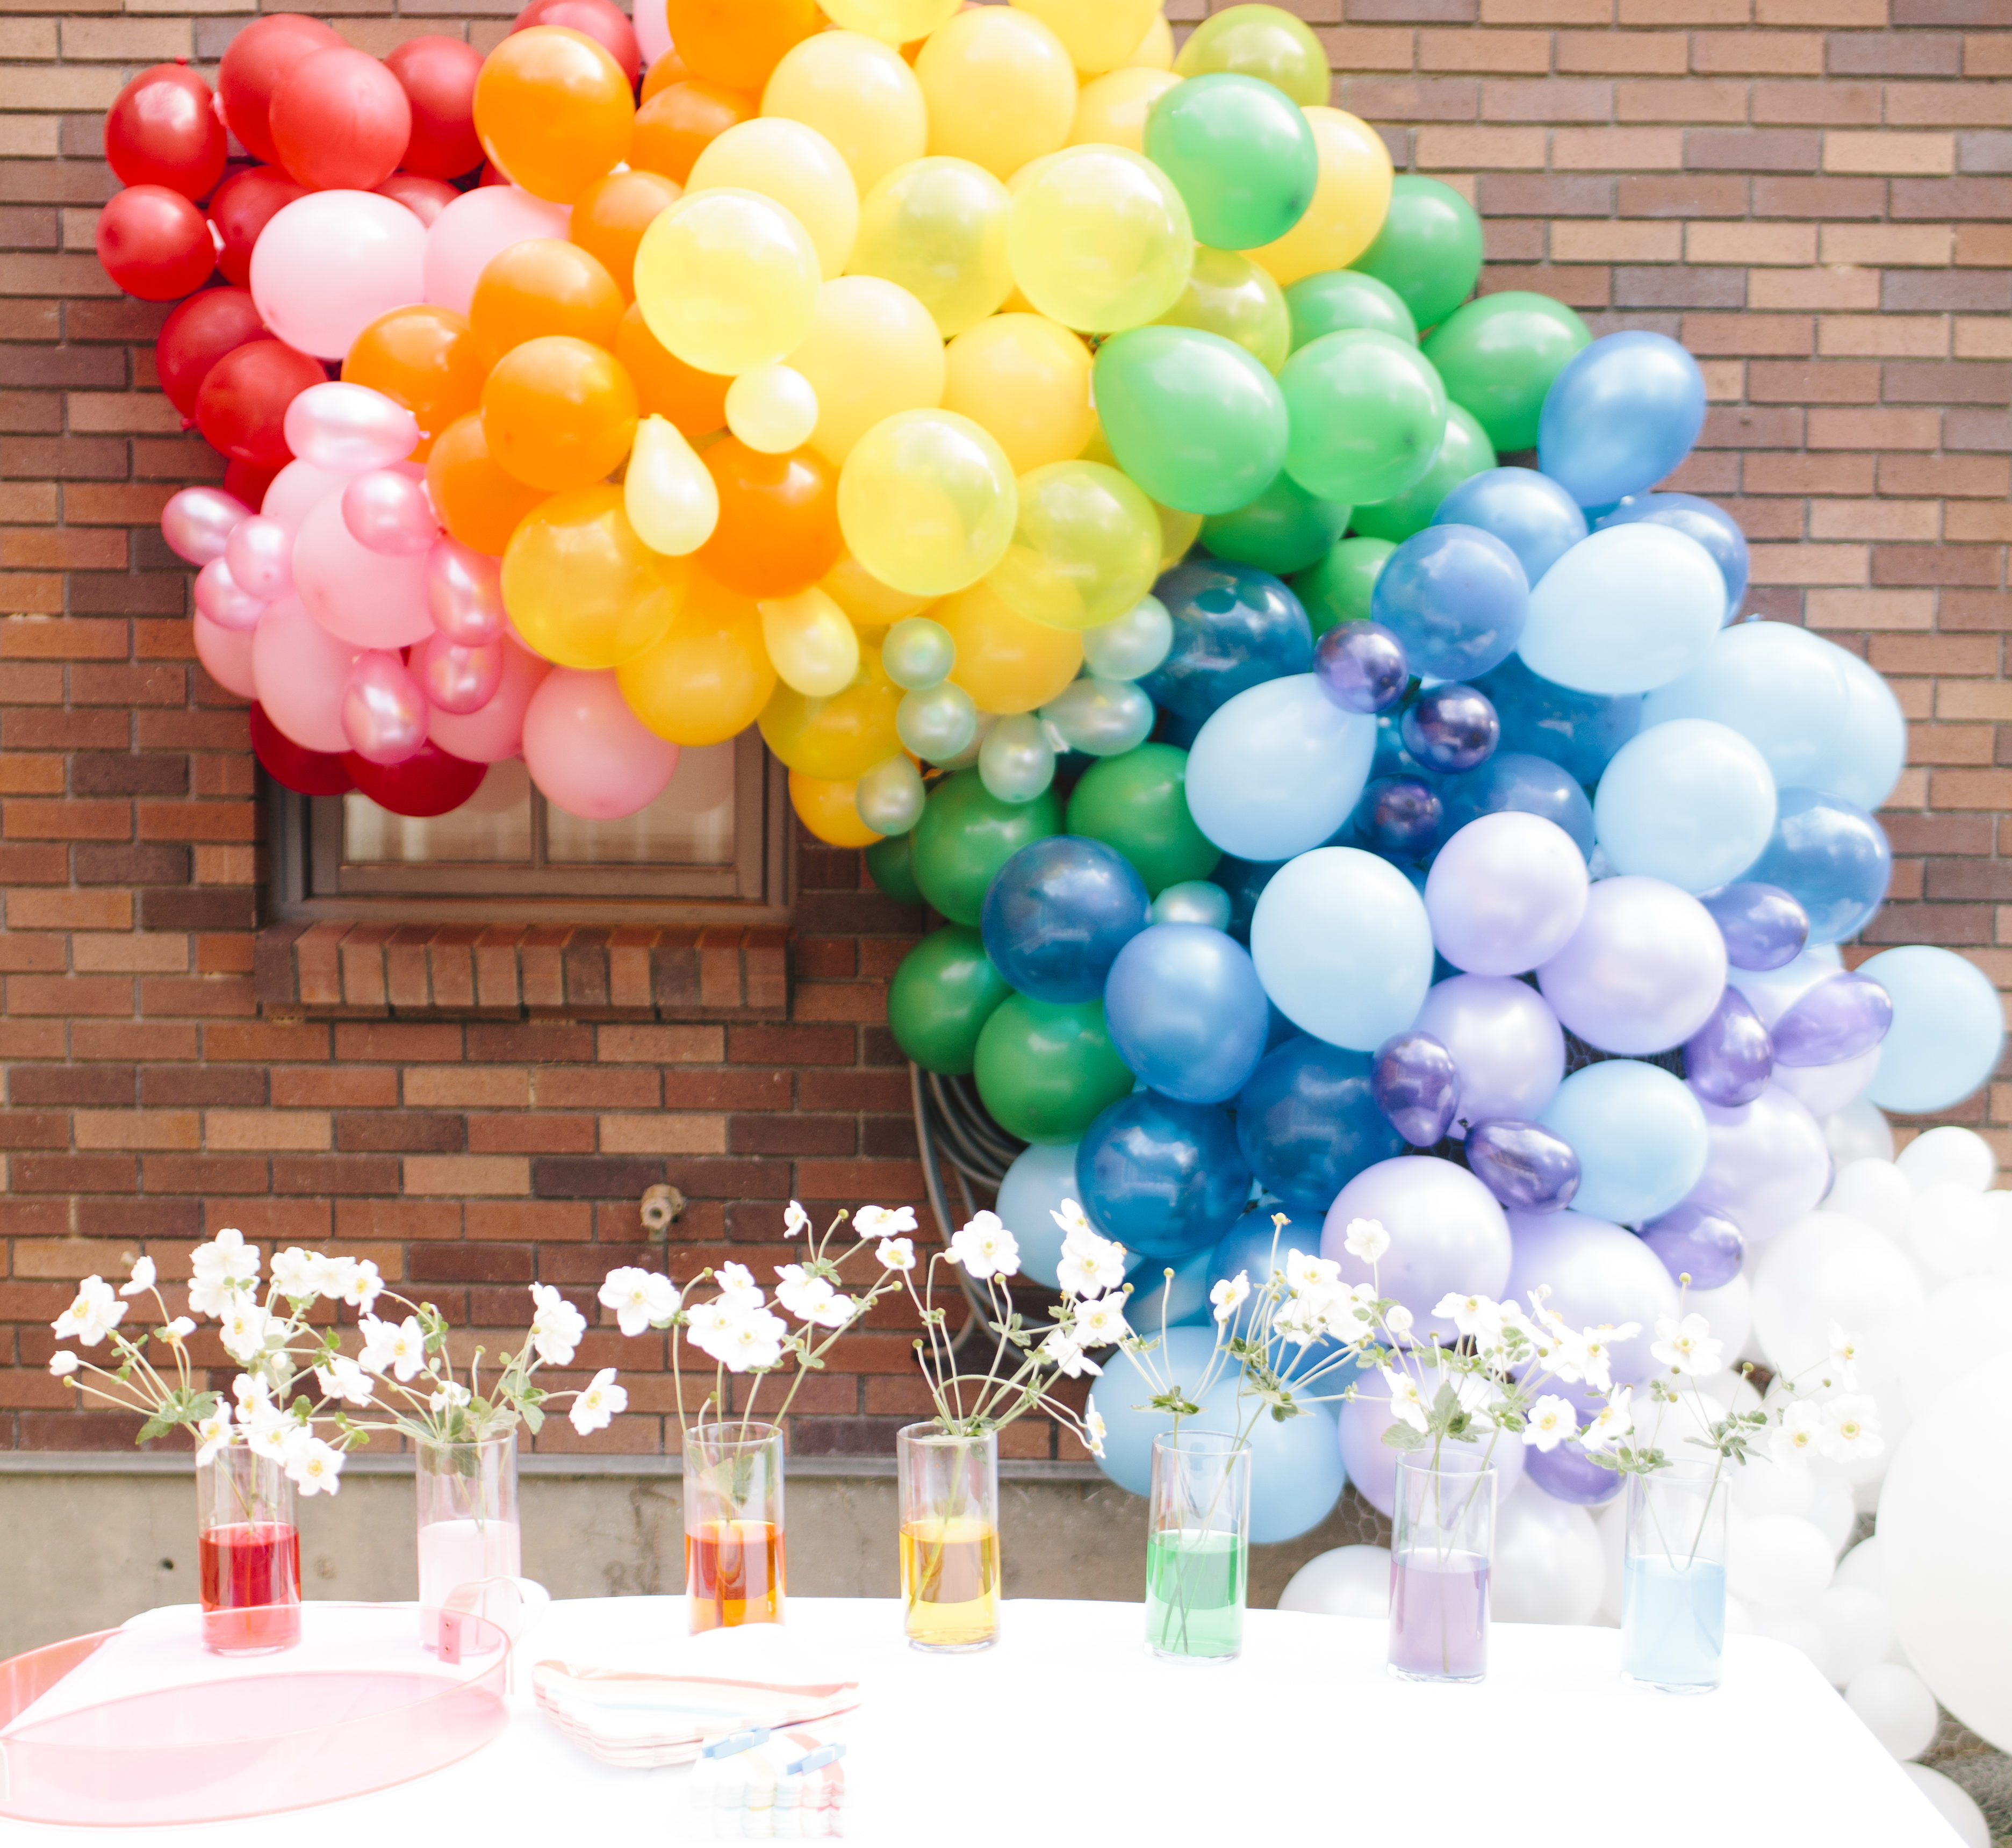
Once your main arch is assembled, you'll likely see some small gaps. Inflate smaller 5-inch balloons and use a low-temp hot glue gun (or glue dots) to attach them into these gaps. This adds fullness and a professional finish. Now is also the time to attach any optional embellishments like artificial greenery, flowers, or foil balloons using glue, fishing line, or tape.
Step 6: Install Your Arch
Carefully transport your finished arch to its desired location. Use strong command hooks or wall hooks to secure the balloon strip to the wall, door frame, or backdrop. You may need multiple hooks to support the weight and achieve the desired curve. Step back and admire your handiwork!
Tips and Tricks for a Perfect Balloon Arch
To truly get all the tips and tricks to make your first DIY balloon arch look professional, keep these pointers in mind:
- Vary Balloon Sizes: This is the number one secret to an organic, professional-looking arch. Don't use all the same size balloons.
- Don't Over-Inflate: Slightly under-inflated balloons are more pliable, less likely to pop, and easier to fit together tightly.
- Use a Pump: Save your lungs and time! An electric pump is a worthy investment if you plan on making arches regularly.
- Work in Sections: For very long arches, it can be easier to create smaller sections and then connect them.
- Pre-Plan Your Colors: Lay out your balloons in the order you want to attach them before you start, especially if you have a specific pattern in mind.
- Add Greenery/Flowers: Faux foliage or fresh flowers can elevate a simple balloon arch to a stunning display.
- Practice Makes Perfect: Your first arch might not be flawless, but each one gets easier and better!
Frequently Asked Questions (FAQ)
Here are some frequently asked questions that often come up when making a DIY balloon arch:
Q: How long does it take to make a balloon arch?
A: A basic 6-8 foot arch can take anywhere from 1.5 to 3 hours, depending on your experience and whether you have help. Inflation is usually the most time-consuming part.
Q: How long will a balloon arch last?
A: Indoors, an air-filled balloon arch can last for several days, even up to a week or more, especially if kept away from direct sunlight and extreme temperatures. Outdoors, they might last a day or two, as weather conditions can affect them.
Q: Can I make it the day before the party?
A: Absolutely! Air-filled arches hold up well. Making it the day before can significantly reduce stress on the day of the event.
Q: Do I need helium?
A: No, most DIY balloon arches are air-filled. Helium is only necessary if you want balloons to float individually, but for an arch structure, air is perfect and much more cost-effective.
Q: What if I don't have a balloon pump?
A: You can use a hand pump, but it will take longer. Blowing up balloons by mouth is not recommended for an entire arch as it's exhausting and can introduce moisture into the balloons.
Get Creative with Your Balloon Arch Ideas!
Once you've mastered the basics, the possibilities are endless! Get stunning balloon arch ideas now by looking at various party themes, color palettes, and additional embellishments. You can create ombre arches, incorporate themed foil balloons, add fairy lights for evening events, or even combine different textures like fabric drapes. Your imagination is the only limit!
Summary
Creating your own balloon arch is a rewarding and surprisingly simple DIY project that can transform any event. As we've shown, it's easier than you think!, and while they look impressive and complex, they are actually quite simple to make. By understanding the basic definition, choosing the right method, gathering your materials, and following our step-by-step tutorial, you're well on your way to crafting a beautiful party statement. Remember to use our tips and tricks and don't be afraid to get creative. A balloon arch makes a pretty party statement so make a DIY balloon garland today! and discover how once you learn how to make one, you’ll find it elevates the fun at any event, leaving your guests in awe of your decorating prowess.
How To Make Balloon Columns
How To Make Balloon Arch

How To Make Balloon Columns
