Master The Skies: Your Ultimate Guide To Making Amazing Paper Airplanes
There's a unique magic in watching a simple sheet of paper transform into something that defies gravity, soaring through the air with grace and precision. Whether you're a child at heart or looking for a fun, engaging activity to share with family, the art of making paper airplanes is a timeless pursuit that combines creativity, a touch of engineering, and pure, unadulterated joy. If you've ever wondered how to craft these miniature marvels of aviation, then you’ve come to the right place.
This comprehensive guide will take you through everything you need to know, from the basic folds to understanding what makes a paper plane fly. Get ready to unleash your inner aviator and discover the simple pleasure of turning a flat piece of paper into a soaring machine. We'll show you how to make paper airplanes with these easy instructions, ensuring that even absolute beginners can achieve impressive results and experience the thrill of flight.
Why Paper Airplanes? The Simple Joy of Flight
In an age dominated by complex electronics and digital entertainment, the humble paper airplane offers a refreshing return to hands-on creation. It's an activity that requires no batteries, no screens, and very little in terms of materials – just a piece of paper and your imagination. The process of folding, the anticipation of the first flight, and the profound satisfaction of watching your creation glide across a room are incredibly rewarding. It subtly teaches basic principles of aerodynamics in a tangible, fun way, sparking curiosity about how things fly and the forces at play in the air. Plus, it's an excellent way to improve fine motor skills, precision, and problem-solving abilities, all while having a blast. It’s a perfect blend of art, science, and play.
Getting Started: The Bare Essentials
One of the best things about paper airplanes is their remarkable accessibility. You don't need any fancy equipment or expensive kits to get started. All you truly require is:
- Paper: Standard A4 or Letter-sized printer paper (typically 80-100 gsm or 20-24 lb bond) works perfectly for most designs. This common paper is easy to fold and holds creases well. Thicker paper might hold more complex creases better for some advanced models, while lighter paper can sometimes offer more glide for certain designs.
- A Flat Surface: A clean, flat table or desk is absolutely ideal for making crisp, accurate folds. This helps ensure symmetry and sharp creases, which are crucial for good flight performance.
- Your Hands: Precision and patience are your most valuable tools here! The more careful and deliberate your folds, the better your plane will fly.
While the process is generally safe and enjoyable, it's worth a small note of caution, especially when flying indoors or in crowded areas: be careful with the ones that are pointy, they can hurt, particularly if thrown with too much force. Always ensure you have enough clear space to launch and retrieve your creations safely, and be mindful of others around you.
A Legacy of Flight: Learning from the Best
For those serious about mastering the art of paper aviation, or even just looking for a new design, there are fantastic resources available online. Did you know that for more than 10 years, Fold'n Fly has been teaching people around the world how to make paper airplanes? Their dedication to sharing this simple yet profound craft has inspired countless individuals to explore the possibilities of paper and air, building a global community of paper plane enthusiasts. They are a shining example of the enduring appeal of this hobby, providing a wealth of knowledge and designs for enthusiasts of all levels.
Many online platforms, including Fold'n Fly, offer comprehensive guides. You can easily learn how to make a paper airplane with our simple step by step photo and video tutorials found across various reputable websites. These resources are invaluable as they break down even complex designs into manageable, easy-to-follow steps, making the learning process smooth and enjoyable. It’s truly amazing how quickly you can pick up the techniques and start creating your own impressive fleet of paper aircraft.
Choosing Your Aircraft: From Simple Gliders to F-16 Jets
The world of paper airplanes is vast and incredibly varied, offering a design for nearly every preference and skill level. There isn't just one type of paper plane; there are classic darts, wide-winged gliders, intricate stunt planes, and even remarkably detailed replicas of real-world aircraft. Before you begin folding, it's fun to consider what kind of flight experience you're aiming for. Do you want something that flies fast and straight like an arrow, or a glider that floats gracefully for a long time, maximizing its airtime?
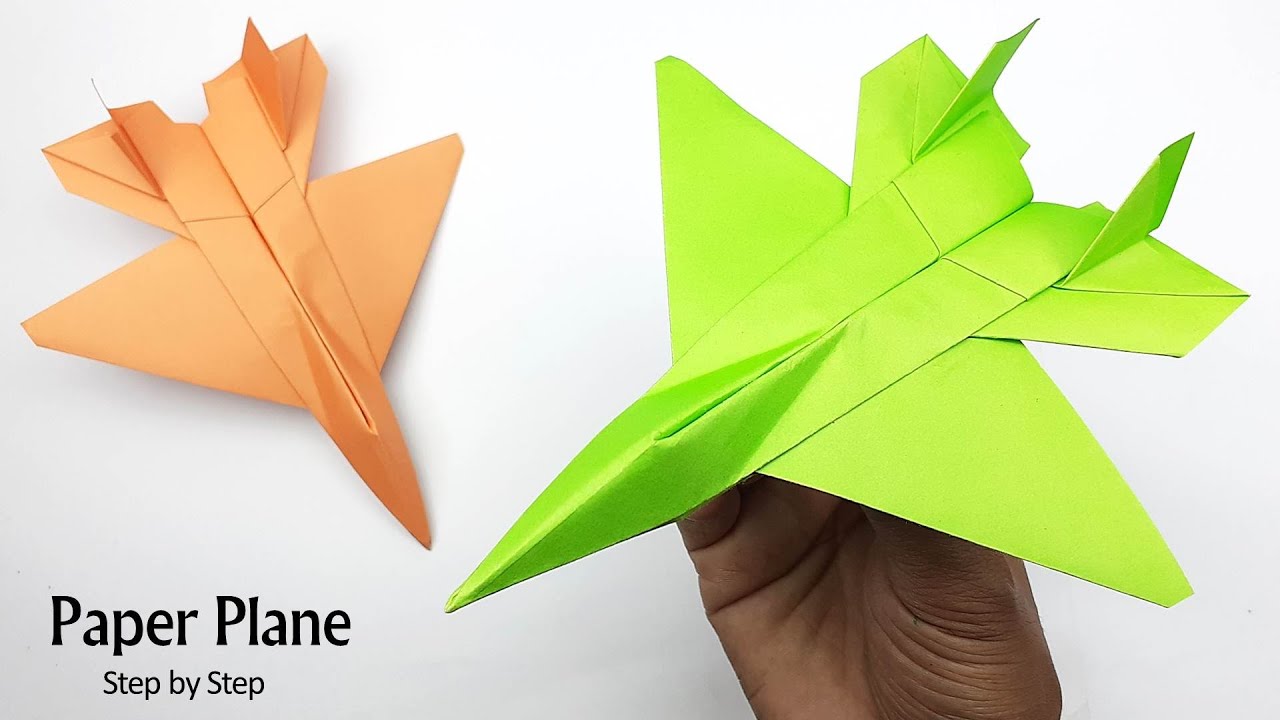
You might start with a classic dart for its speed and relative simplicity, a perfect choice for beginners. Or perhaps a wide-winged glider for maximum airtime and gentle descent. As you gain confidence and refine your folding skills, you might even aspire to create something as intricate and impressive as a paper F-16 jet that truly flies, demonstrating the incredible potential of origami paper airplanes. The internet is filled with an astonishing array of designs, often accompanied by easy-to-follow instructions and even full HD video tutorials, just like those you might find showing how to make a paper f16 jet that flies, (easy) (full hd) origami paper airplane. The possibilities for what you can create are truly endless!
Once you've decided on your design, gathered your paper, and cleared your workspace, it's time to get down to business. Select the plane you want and get ready for takeoff!
The Art of the Fold: Step-by-Step Guidance
The magic of a paper airplane lies almost entirely in its folds. Precision is paramount here; every crease, every fold, every alignment contributes directly to the plane's aerodynamics and overall flight performance. Even a slight misalignment or a soft, imprecise crease can significantly impact how well your plane flies. Remember, it’s so fun to transform a simple piece of paper into a soaring paper plane, and the journey of careful, deliberate folding is a significant part of that enjoyment.
General Folding Tips for Success:
- Be Precise: Always align edges and corners perfectly. For very crisp and accurate folds, especially on larger paper, you can even use a ruler or another straight edge to guide your fold line.
- Crease Firmly: Once an edge is aligned and the fold is in place, press down firmly along the fold line to create a sharp, defined crease. You can use your thumbnail, the edge of a ruler, or even the back of a spoon to burnish the crease.
- Symmetry is Key: For nearly all paper airplane designs, ensuring both sides of the plane are perfectly symmetrical is absolutely crucial for straight, stable flight. Any imbalance will cause your plane to veer off course.
- Work on a Flat Surface: Always perform your folds on a clean, flat, hard surface. This helps maintain accuracy, prevents unwanted wrinkles, and allows you to apply even pressure for sharp creases.
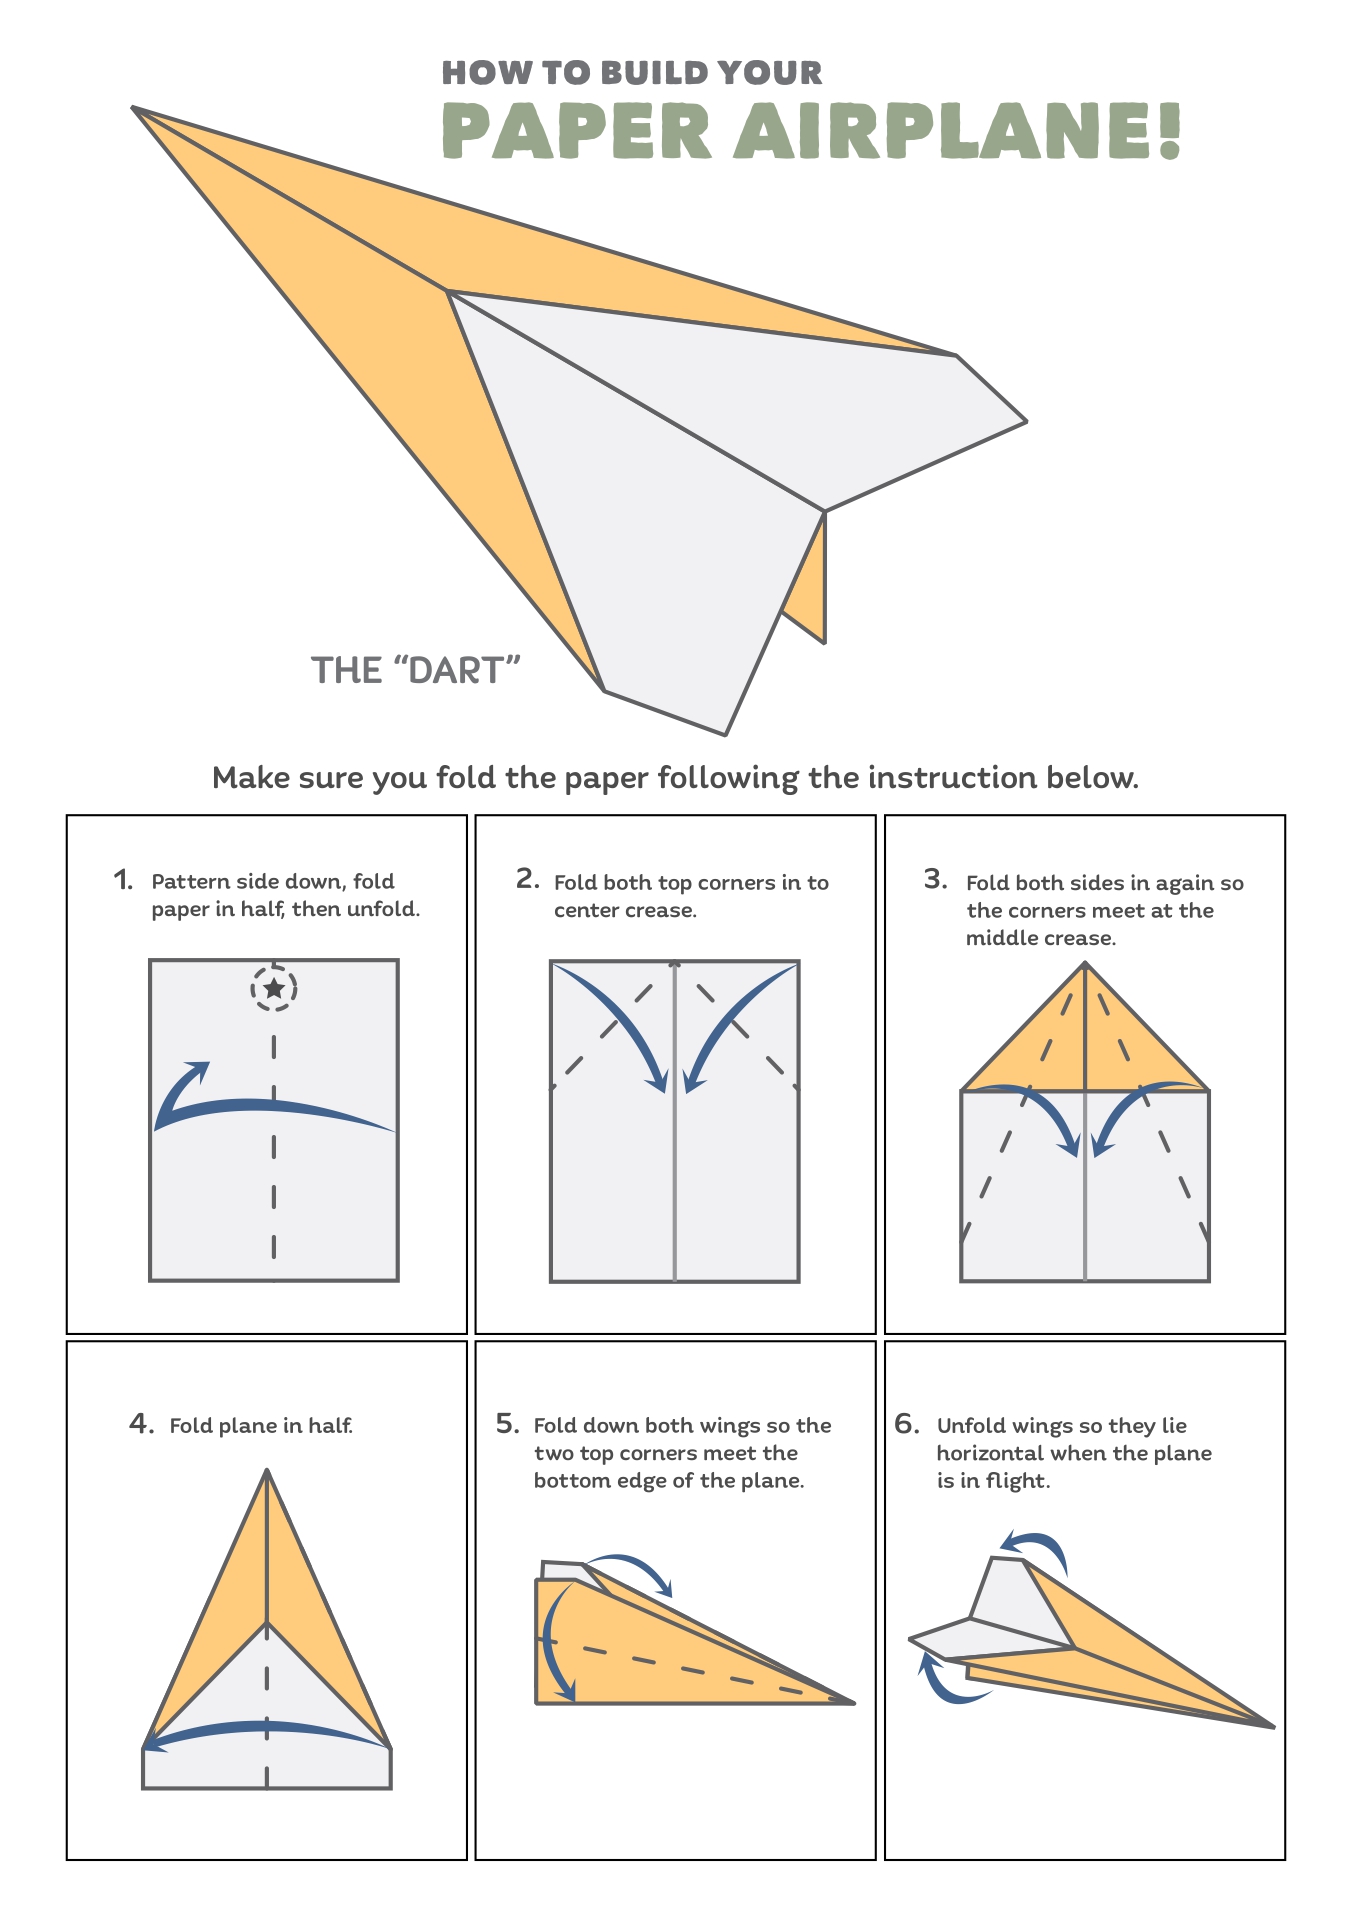
Let's Try a Simple Classic: The Basic Dart
While we can't provide interactive diagrams or videos here, let's walk through the general steps for a very common and easy paper airplane design, often referred to as the "Dart." This will give you a feel for the step-by-step folding process and the principles involved:
- Start with a Rectangular Sheet: Place your standard A4 or Letter-sized paper vertically in front of you, in portrait orientation.
- Fold in Half Lengthwise: Carefully fold the paper exactly in half vertically, bringing the left edge to meet the right edge. Crease it sharply. Then, unfold it. This creates a central guide line down the middle of your paper.
- Fold Top Corners to Center: Take the top-left corner of the paper and fold it down so its edge meets the central crease you just made. Do the exact same thing with the top-right corner. You should now have a pointed top resembling a house roof or a simple triangle.
- Fold Down the Point: Take the newly formed point (the peak of your "roof" or triangle) and fold it down towards the bottom of the paper. Its tip should touch the bottom of the folded-down corners from the previous step, creating a small horizontal flap.
- Fold Top Corners to Center Again: Now, take the new top-left and top-right corners (which are above the small horizontal flap you just created) and fold them towards the central crease again. This will create a sharper, narrower nose for your plane.
- Secure the Flap: Fold the small horizontal flap (from step 4) upwards, over the two newly folded corners. This acts as a lock, securing them in place and forming the solid nose of your plane.
- Fold in Half: Carefully fold the entire plane in half along the original central crease, with the folded sections (the nose and locked flaps) on the outside.
- Create the Wings: Hold the folded plane. Fold down one side to create a wing, ensuring the fold is parallel to the bottom edge of the plane's body. Flip the plane over and repeat for the other wing, making sure both wings are symmetrical in size and angle.
- Adjust Wingtips (Optional): For better stability and flight control, you can slightly curl up the very back edge of the wings (these are called elevons) or add small vertical folds (winglets) at the tips of the wings. Experiment to see what works best!
And there you have it! A basic dart, ready for its maiden flight. This simple process beautifully demonstrates how a few precise folds can transform a flat sheet of paper into something truly capable of flight.
Testing Your Creation and Improving Your Technique
Once your paper airplane masterpiece is complete, it's time for the moment of truth: the test flight! Test your paper folding technique with these paper airplane examples you've just created. Don't be discouraged if your first few attempts don't fly perfectly; this is a fundamental part of the learning and refinement process. Every flight provides valuable feedback.
Tips for a Successful Flight and Troubleshooting:
- Proper Throwing Technique: Hold the plane gently by its body, usually just behind the nose or at its center of gravity. Throw it forward with a smooth, steady motion, rather than a forceful jerk. Avoid throwing it too hard or too softly.
- Optimal Angle of Launch: For most gliders, a slight upward angle (around 10-20 degrees from horizontal) is ideal for maximum lift and airtime. Darts, designed for speed, might benefit from a more direct, horizontal launch.
- Indoor vs. Outdoor Flight: Always start your testing indoors where there's no wind or unpredictable air currents to interfere with your plane's natural flight path. Once you're confident in its performance, take it outside on a calm day.
- Troubleshooting Common Flight Issues:
- Dives immediately: The nose might be too heavy, or the wings aren't providing enough lift. Try adjusting the wing angle slightly upwards (like an elevator) or, if the design allows, adding a small paperclip to the back of the plane.
- Stalls (flies up sharply, then drops): The nose might be too light, or the angle of launch is too steep. Try adding a tiny bit of weight to the nose (e.g., a small piece of tape or a staple) or launching more horizontally.
- Turns sharply to one side: This is almost always an issue of asymmetry. One wing might be slightly larger, folded differently, or have a different angle than the other. Carefully check for symmetry and make minute adjustments to the wings or tail. Small adjustments to the wingtips (elevons or rudders) can also help correct turns.
Experimentation is absolutely key to becoming a paper airplane master! Try different throwing angles, make small, incremental adjustments to the wings or tail, or even try a completely new design. Each flight offers a chance to learn, refine your technique, and deepen your understanding of aerodynamics.
Conclusion: The Sky's the Limit!
Making paper airplanes is far more than just a simple craft; it's an accessible gateway to understanding basic physics, fostering creativity, and experiencing the pure, unadulterated joy of seeing your creation take flight. From the quiet satisfaction of a perfectly creased fold to the exhilarating thrill of a long, graceful glide, every step of the process is rewarding. Throughout this guide, we've explored why this timeless hobby endures, what minimal materials you need to get started, and how dedicated resources like Fold'n Fly have championed this delightful art form for over a decade.
We've also touched upon the diverse range of designs available, from the straightforward elegance of simple darts to the intricate complexity of designs mimicking F-16s, and provided essential tips for both the folding process and the crucial test flights of your aerial masterpieces. The journey of making and flying paper airplanes is one of discovery, patience, and endless fun.
So, grab a sheet of paper, find a flat surface, and let your imagination take flight. The sky truly is the limit when it comes to the amazing things you can create with just a piece of paper and a few well-placed, precise folds. Happy flying!

How To Make A Cool Paper Airplane Step By Step
Printable Paper Airplane Instructions
Instructions On How To Make Paper Airplanes Step By Step
