Master The Art Of Drawing A Chicken: A Fun & Simple Guide For All Ages
Why did the chicken cross the road? So you can draw it! Welcome, budding artists and curious minds! If you've ever wanted to capture the charm of a clucking chicken on paper or screen, you've come to the right place. Drawing a chicken might seem like a complex task at first glance, but we're here to show you just how easy it can be. This tutorial is designed for everyone – whether you're a kid, a beginner, or simply looking for a fun new drawing challenge.
Our approach focuses on breaking down the drawing process into simple, manageable steps using basic shapes and lines. This foundational method is at the core of all our drawing tutorials, ensuring that you can follow along with ease and gain confidence in drawing chickens (and many other things!). So, grab your tools, and let's embark on this creative journey together!
Getting Started with Your Chicken Drawing Adventure
What You'll Need
Before we dive into the steps, let's talk about the art supplies you might need. The beauty of drawing a chicken is that you don't require anything fancy. Here are the essentials:
- Paper: Any kind will do, from a simple sketchpad to printer paper.
- Pencil: A standard graphite pencil (HB or 2B are good for sketching) and an eraser.
- Colors (Optional): Crayons, colored pencils, markers, or watercolors if you want to bring your chicken to life with color.
For those who prefer a digital approach, there are fantastic options available. Many free online drawing applications for all ages allow you to create digital artwork. These platforms often let you export your creations to popular image formats like JPEG, PNG, SVG, and PDF, making it easy to share your art online or print it. We'll touch more on digital tools later!
The Foundation: Simple Shapes and Lines
The secret to drawing a great looking chicken, or any animal for that matter, lies in starting with simple shapes. Don't be intimidated by the final image; every intricate drawing begins with basic geometric forms like circles, ovals, and triangles. In this tutorial, we will guide you to draw a chicken using precisely these simple shapes and lines, building it up step by step. This method is perfect for kids and beginners, making the process less daunting and more enjoyable.
Step-by-Step Guide to Drawing a Chicken (Hen)
Ready to draw a perfect chicken? By following these simple steps, you too can easily create your own feathered friend. Remember, you can always watch a short video tutorial if you prefer a visual guide, but these instructions are designed to be clear and easy to follow.
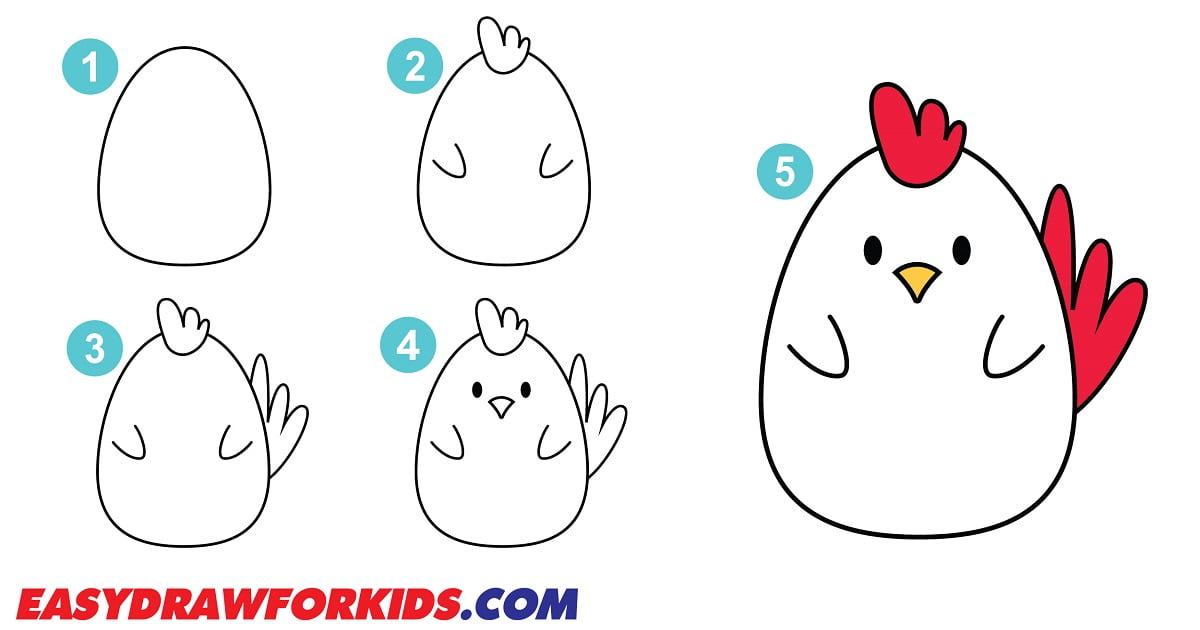
Step 1: The Body (The Big Oval)
Begin by drawing a large oval shape in the center of your paper. This oval will form the main body of your chicken. Think of it as the chicken's belly and back. Don't press too hard with your pencil; these are just guide lines.
Step 2: The Head (The Smaller Circle)
Above and slightly to the left of your large oval, draw a smaller circle. This circle will be the chicken's head. Make sure there's a small gap between the head and the body for the neck.
Step 3: Connecting the Parts (The Neck)
Now, connect the head circle to the body oval with two curved lines. These lines will form the chicken's neck. Make them slightly wider at the base where they meet the body and narrower as they reach the head.
Step 4: Adding Features (Beak, Comb, Wattle, Eye)
This is where your chicken starts to come to life! On the head, draw a small triangle for the beak. Above the beak, draw a small circle for the eye. On top of the head, draw the comb – that fleshy red crest. You can make it wavy or spiky. Below the beak, add the wattle, which looks like a small, hanging flap of skin.
Step 5: Legs and Feet
From the bottom of the body oval, draw two simple lines for the legs. Chickens have thin legs! At the end of each leg, draw three toes pointing forward and one pointing backward, like a "Y" shape for each foot. You can add small lines for texture on the legs.
Step 6: Wings and Tail Feathers
On the side of the body, draw an elongated oval or a curved shape for the wing. It should sit within the main body oval. For the tail, draw a few curved lines extending from the back of the body, fanning out to create the look of tail feathers. These can be simple, overlapping curves.
Step 7: Refine and Erase
Now that you have all the basic shapes in place, it's time to refine your drawing. Gently erase any overlapping guide lines that you no longer need, such as the initial parts of the oval and circle that are now covered by other features. Go over your desired lines to make them darker and more defined.
Step 8: Add Your Own Details! 🐔
This is the most fun part! Don't forget to add your own details to make your chicken unique. You can add feathers texture with small "U" or "V" shapes on the body and wings. Give your chicken an expression, or even draw some grass or a barn in the background. Experiment with different colors to make your hen vibrant and lively!
Taking Your Chicken Drawing Further
Practice Makes Perfect
The more you draw, the better you'll become. Remember, practice is key to gaining confidence in drawing chickens. Try drawing your chicken from different angles or in different poses. Experiment with the five different techniques you might find in various tutorials to help budding artists create their masterpieces. Each attempt helps you understand shapes and proportions better, allowing you to easily draw a perfect chicken every time.
Exploring Digital Drawing
If you're interested in digital art, there's a whole world of possibilities! A free online drawing application for all ages can be a fantastic tool. These applications allow you to create digital artwork to share online and export to popular image formats like JPEG, PNG, SVG, and PDF. Beyond just drawing, some of these tools can help you easily draw, edit photos, or even design your next business card. You can craft images for social media posts, digital ads, paper, or even apparel!
Many digital drawing tools offer user-friendly features like drag-and-drop for quick photo edits or shortcuts like drawing the letter “s” to access a style chooser. Some even allow you to access tool presets by holding a button and tapping the screen with different finger combinations. These features make digital art accessible and fun for everyone, regardless of their experience level. Once your digital chicken is complete, consider sharing it on drawing fan pages on platforms like Facebook, where you can connect with other kids and artists!
Conclusion
You've just learned how to draw a great looking chicken using simple drawing instructions! By breaking down the process into easy-to-follow steps, starting with basic shapes and lines, anyone can create a charming chicken drawing. Whether you prefer traditional paper and pencil or exploring the exciting world of digital art with a free online drawing application, the joy of creation is within your reach. Remember to practice, experiment with your own details, and most importantly, have fun with your art. Keep drawing, keep creating, and watch your skills (and your flock of drawn chickens!) grow!
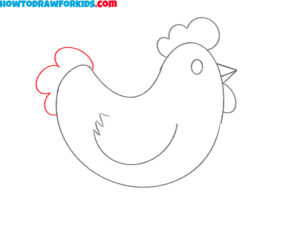
How To Draw A Chicken – 5 Ways (With Pictures)

How to Draw a Chicken - Easy Drawing Tutorial For Kids
How to Draw a Chicken - Easy Drawing Tutorial For Kids
